 Before I start, I must mention that some foam gives off very dangerous fumes when it melts or burns, so ALWAYS CHECK THE FOAM YOU ARE USING IS SAFE BEFORE USING A HOT WIRE TO CUT FOAM! Even if the foam is technically safe to cut, you should probably work in a well-ventilated area, and some breathing protection couldn't hurt either. Seriously, take care of your health!
Maybe it's because I'm kind of a perfectionist, but I have a tendency to look at things and feel the need to make my own version that's better suited to my particular needs. When it comes to storing miniatures in foam, it's hard to find foam that fits your collection just right: everyone's collection is unique, and of course so many models these days have bits sticking way out over the base so don't fit easily in standard cutouts. So I wanted to try to cut my foam to my own needs, hopefully storing my models as efficiently and safely as possible.
Which of course is easier said than done. After some thought and trial-and-error, this is what I came up with. I'm sure there's better ways, but this is what worked for me. I'm posting this here in case it's helpful to anyone.
The first problem I had was actually finding a way to plan the cuts; it's a little hard to get the exact shape of the hole you need to cut for a 3-dimensional object in a useable form, at least without special tools. I had an idea for a simple tool to trace the outline of a model onto paper. I designed it to have a narrow wedge shape when seen from above, allowing it to tightly hug a model while being traced around the outside despite having a stable base. I also tried to make the shape somewhat ergonomic in the hand.
 It took three prints to get it right; I wanted to print it upside down so the base would be smooth, but it wouldn't print straight even with a whole heap of supports. So I gave up and printed it right-side-up, smoothing the base with some sand paper afterwards (taking care to keep the base perpendicular to the groove on the side). I have uploaded the STL files to Thingiverse here.
 Once this was printed and cleaned I sharpened a 2mm steel rod and glued it to the vertical groove in the tool. Rather than sharpening the rod like a pencil or something, I gave it a wedge shape so that the edge would be right up against the model. I made sure the tip was away from the base of the tool, and just a fraction of a millimeter below the level of the base.
 This way when the tool is dragged across a piece of paper, it will leave a visible mark. The tool could then be run around the outside of a model, making sure to keep the base flat, to transfer the shape to a piece of paper. I could then go over this with my hobby knife to cut out the outline of the model.
 I used thick art paper so it would hold up to the process and hold it's shape well, and just to verify that the outline was correct I placed the model in the hole in the original sheet and lifted it upwards, keeping an eye out for any bits of the model catching on the paper.
 The cut outlines could then be used to plan how the models would fit into the foam. Once a good layout is decided upon, the paper can be be glued to the foam. I used white school glue (PVA); remember that some glues will dissolve some foams, PVA works well and gives you a little bit of time to fine-tune the positions.

The next issue was how to cleanly cut the foam. My initial attempts at using a sharp knife did not give me results I was happy with. I spent a good deal of time online looking at different foam cutting tools, before finally deciding that I would get the best results with a hot wire foam cutting table. So I ordered this fellow off Ebay:
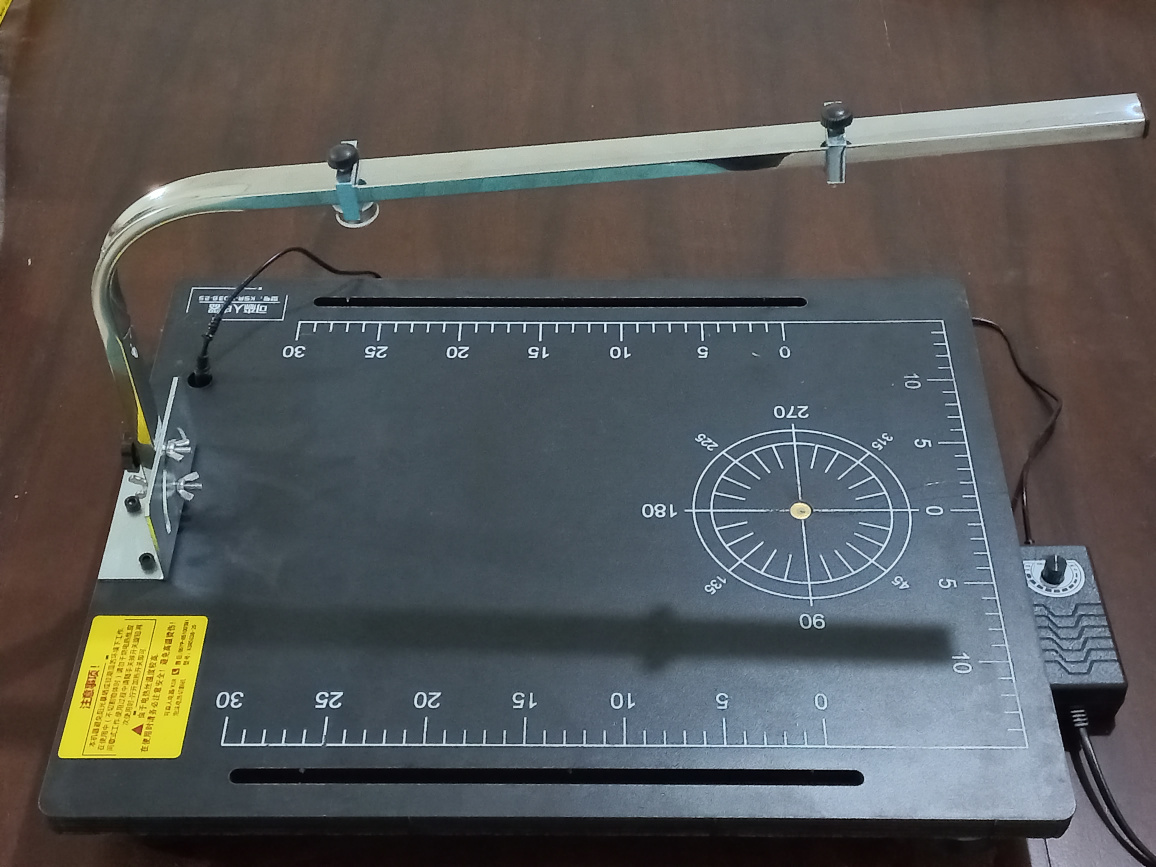 There are two brackets that screw onto the arm: one with a simple loop, and one with a spool of wire. Underneath the table is a hook that the wire can be attached to. The brackets and arm can be adjusted to get the desired angle and tension of the wire.
 This was an issue because the table seems to be designed to cut into a block of foam from the side, not cut out holes in the middle. I considered passing the wire through the foam before passing it through the hole at the center of the table and attaching it to the hook underneath, but this would be extremely awkward as the wire would need to be pulled through and attached to the hook under tension while the table was on it's side and the foam was hanging off the wire. So I had to come up with a different way to pass the wire through the foam.
I decided to keep the wire in place underneath the table and set up a hook and loop above the table. So I removed the spool from one of the brackets and replaced it with a loop. This was a simple ring-pull from a drinks can; I considered using a piece of wire or bent paperclip or something, but I wanted something that wouldn't flex and this seemed to work. I could have cut the screw short to hold it in place, but I simply printed out a plastic spacer instead.
 By moving this bracket back and forth on the arm I could adjust the tension, with the other bracket maintaining the correct angle at the desired tension.
 Next was the hook. It needed to be able to pass through the original loop on the other bracket, and I also figured it would be helpful if it was something I could easily push through a slit in the foam. So I took some 3mm brass rod, cut it to about 12cm in length, ground a hook on one side with a rotary tool, and drilled a small hole in the other for the wire. I used the rotary tool with an engraving bit to try to bevel the edges of the hole so it would be less likely to wear through the wire, and tried to cut a channel for the wire along the end.


 Once everything was in place and the wire hooked up at both ends, I carefully set the position of the arm and the brackets so that the wire was completely vertical (or rather completely perpendicular to the foam cutter table surface), using a carpenter's square to get the angle right.
 I cut out a slit of paper from each outline (before gluing them on of course), and then once they were attached to the foam I used a sharp knife to poke a hole through the foam in the middle of the desired area. I unhooked the brass rod from the arm and passed it through the foam in the aforementioned slit.
 I carefully reattached the brass rod to the arm, making sure to position the foam correctly before pulling the wire tight.
 I then turned on the power and carefully traced around the paper, turning off the power as soon as I had returned to the start. After unhooking the brass rod and passing it back through the foam, I was able to push the cut area out of the foam block.
 The results were pretty good, with clean vertical cuts. Not perfect of course, but a huge improvement over my attempts with the knife - which you can see on the other side of the block of foam.
 When adding shorter models, there was a lot of room above the model. Since one of the goals was to have a relatively snug fit to reduce potential movement, I experimented with slicing the foam that was removed from the slots in order to create "spacers" to raise the short models and leave less empty space on top. I roughly measured the excess height, set the gate on the foam cutter, and tried to make flat, level cuts. I then pushed the cut piece to the bottom of the slot (without gluing it in place or anything). The results were pretty good. In theory it would be possible to deliberately introduce a slant to the spacer, for example to angle a model with a lot of overhang so that it takes less room in the foam. It would be quite tricky to actually pull off though.


Overall I was able to achieve a very nice fit, with just a tiny bit of clearance all around the models. When all the necessary slots have been cut, the base sheet can be glued on using PVA, UHU, or some other gel glue. Just remember to do a test on an offcut first to make sure it doesn't dissolve the foam.

No comments:
Post a Comment